
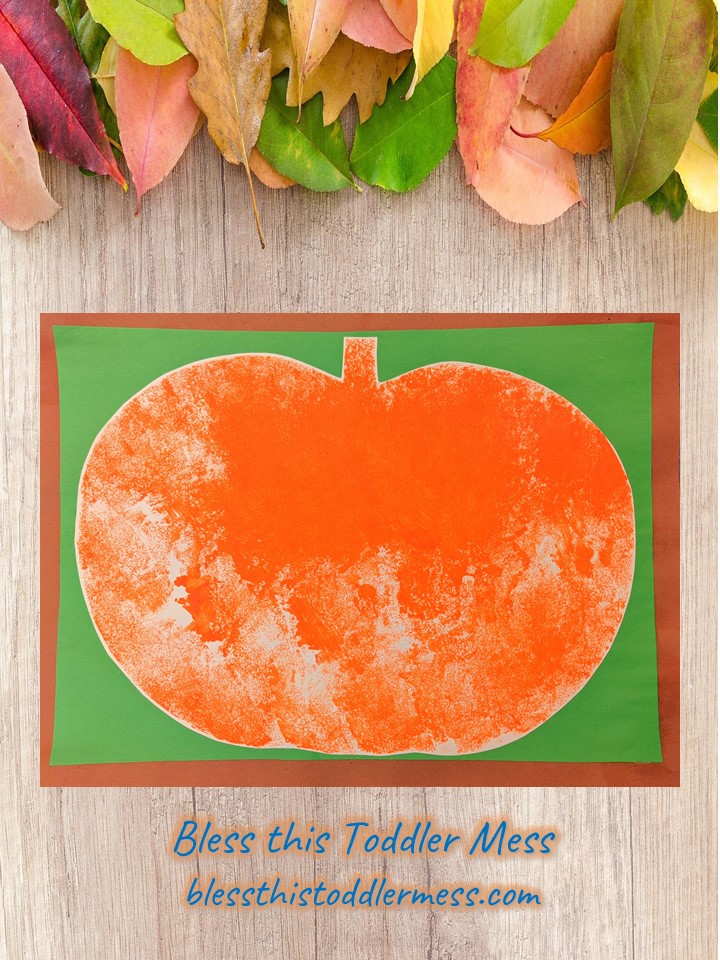
“Child directed art” is all the rage in early childhood education. This project takes child directed art and turns it into gorgeous pumpkin wall art!

To make projects like this I make a frame and have the kiddos paint with various items (or their hands!) over the whole area. Once they feel satisfied with their efforts, I remove the frame and the shape is revealed! I use this technique for many many projects – it’s super simple and allows your kiddos to paint freely then be surprised when you reveal their creation!

One of my favorite tools to paint is this magical sponge-wand (yes…I named it this myself and even now I know what it’s actually called I can’t go back lol) It leaves the coolest texture, and the kids always enjoy thwacking it on the paper 

You can find them here – I won’t show you a current picture of mine. I think after years of faithful service it has had its final days – the last two year old who used it was very enthusiastic and ended up with plenty of sponge bits plastered into his now 3D textured pumpkin
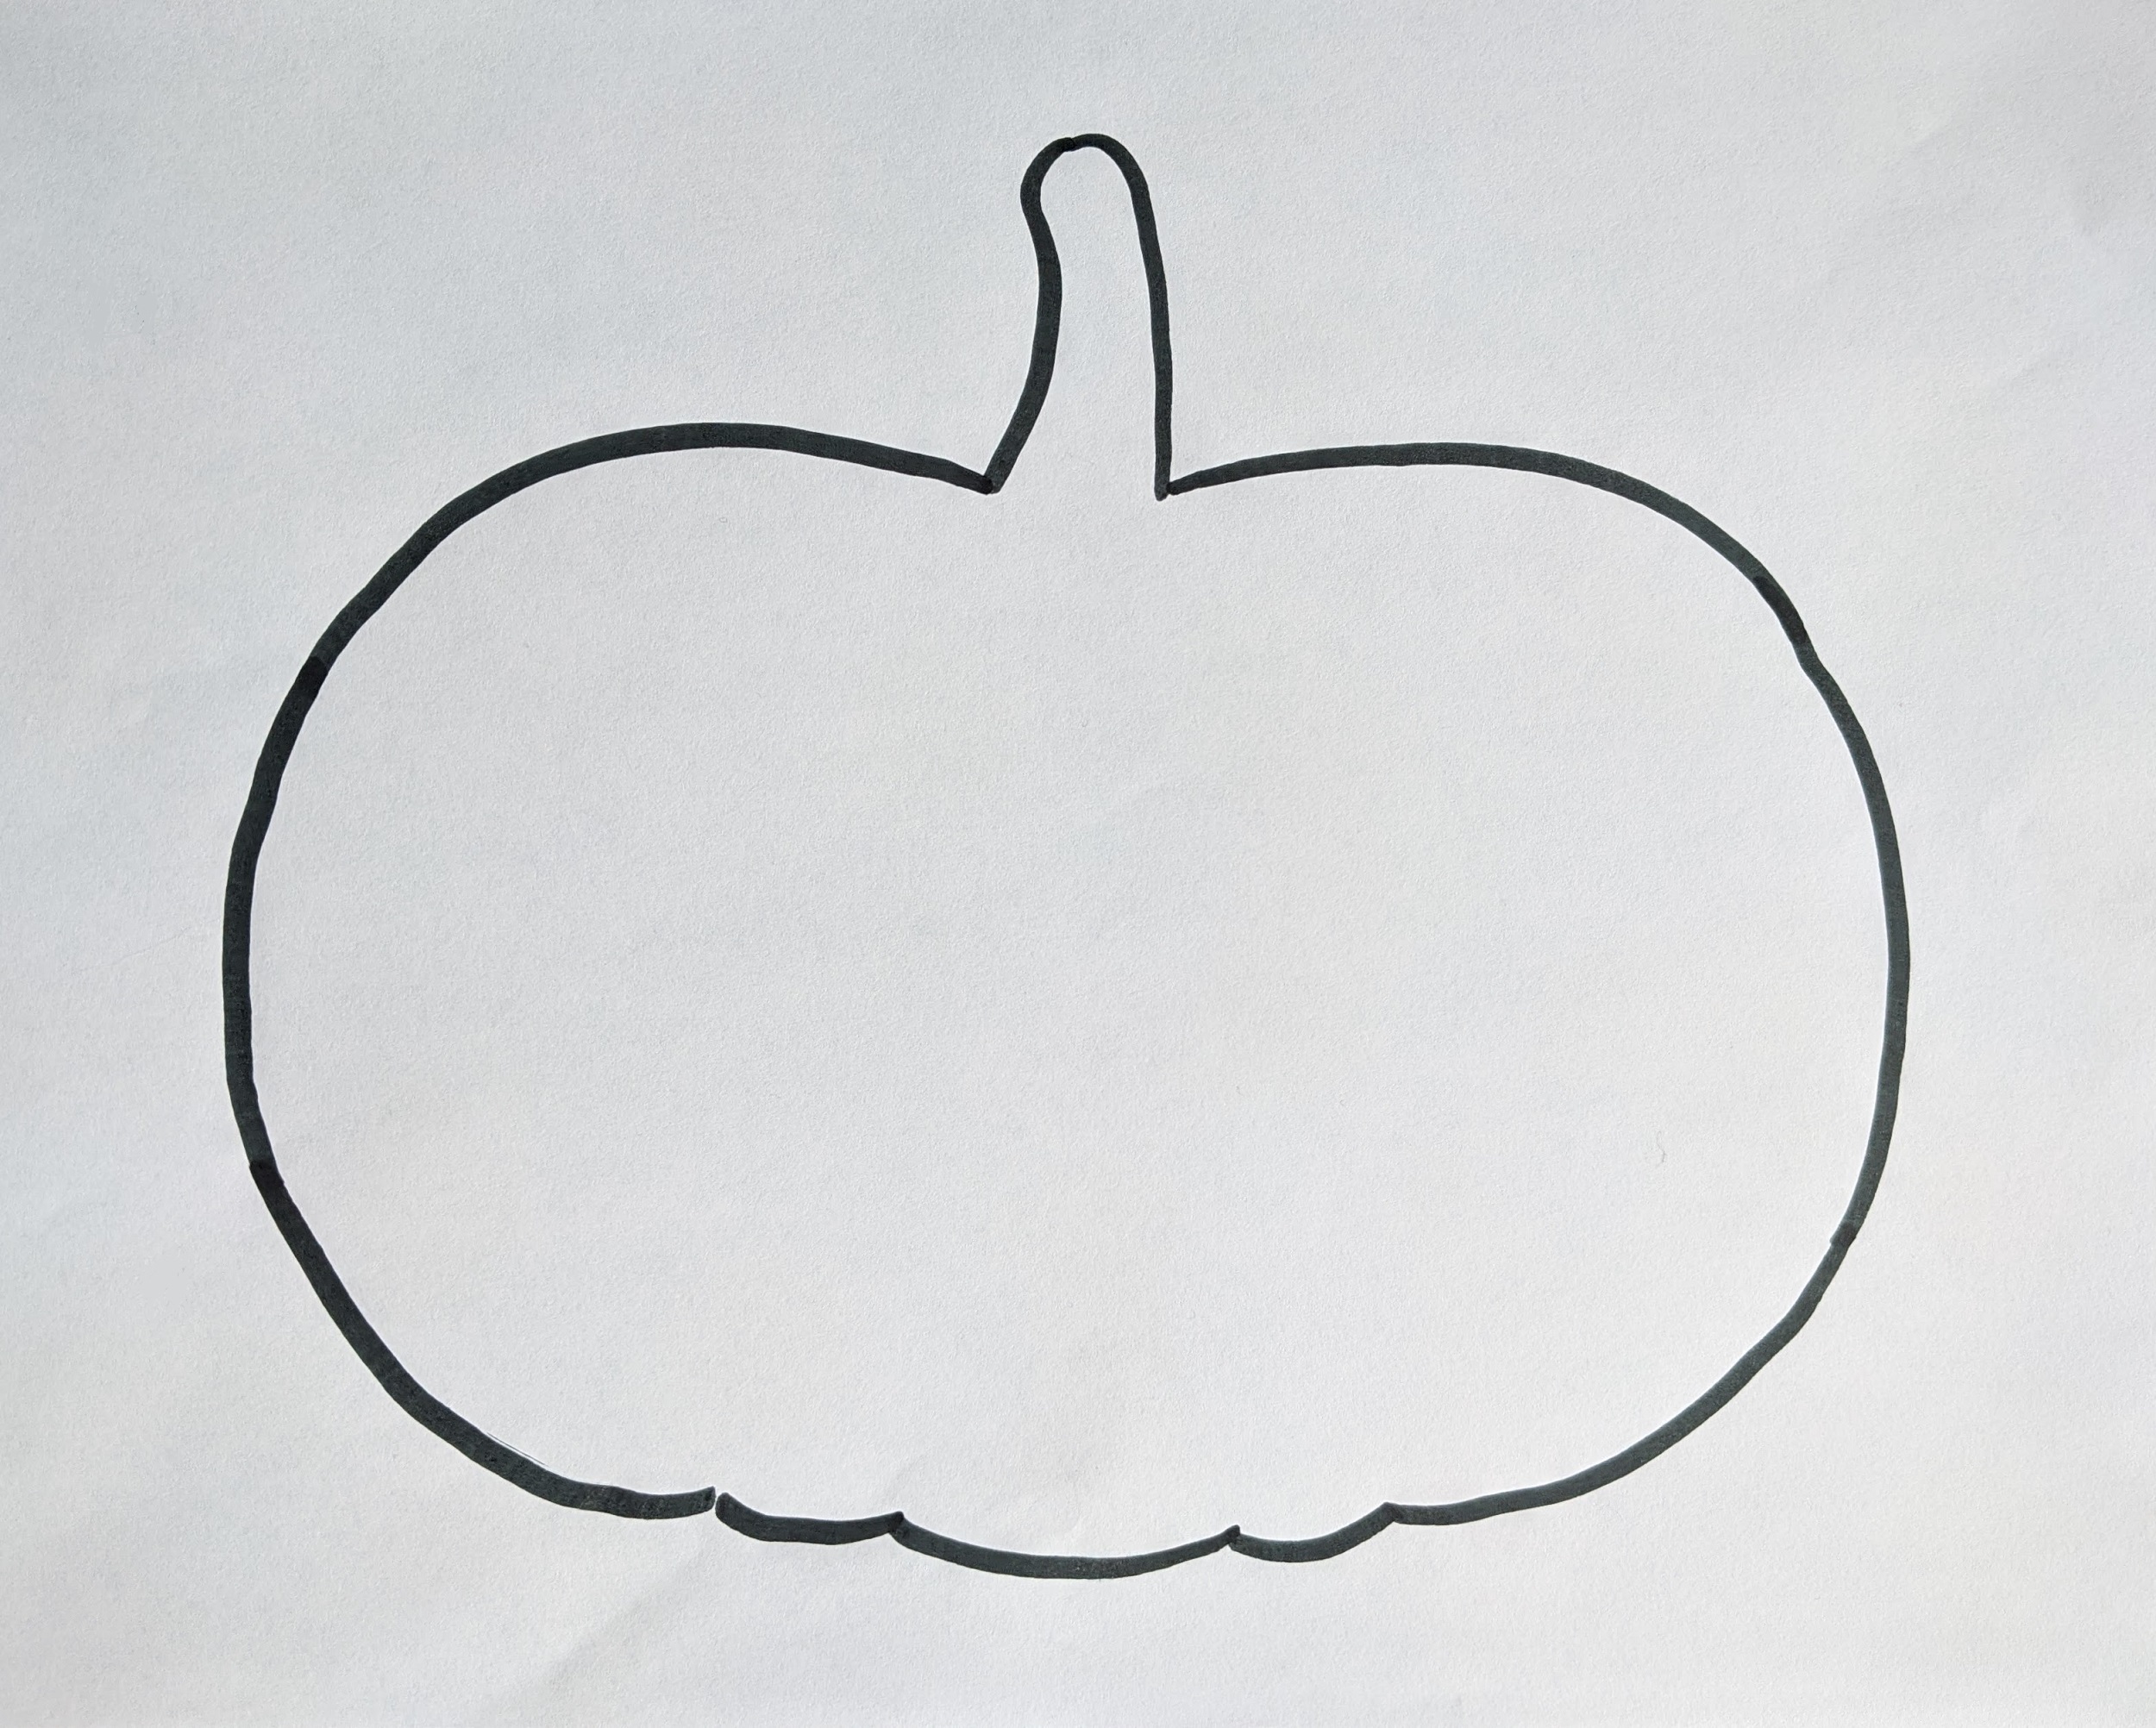
I start with an outline (you can get mine here – I made this one a little smaller than what I used for this blog but set the file as a jpeg meaning you can re-size it if you want a bigger/smaller pumpkin! ) and cardstock. I really do recommend cardstock if possible for you – regular paper will curl or break apart when a lot of paint is applied, so for a teacher who needs to use the frame for multiple children cardstock is really the way to go. If you are doing this with only one or two kiddos, regular paper should hold up.


The next step you can do two ways – either cut out the outline and trace it onto the cardstock OR if you place the outline on top of the cardstock and firmly draw over the outline with a pen – it will leave an indent on the cardstock that is visible enough to follow with your scissors thereby skipping a step!
Next carefully cut out the INSIDE of the outline, leaving a pumpkin shaped frame. Tape this frame over a piece of white paper (again, choose cardstock vs regular paper depending on how much paint you plan on letting the kiddo plaster on. Paintings like these can get really crackly on regular paper once they dry making gluing it flat later on really difficult). I would also suggest taping the bottom paper down so it doesn’t wiggle around while they are going to town 

One last tip before you let your kiddo make their mark – I highly recommend a painting shirt or smock for this. If you are using something like the sponge-wand you may think as I did at first that your kiddo will stay relatively clean, but what I quickly learned is once they get thwacking, the paint flies
And you’re ready to go! Thwack away!


Once they are done I love making a big deal of the grand reveal – you know, a countdown, a “TADA! A pumpkin!”, proudly declaring to the whole room “Look at so-and-so’s pumpkin! It’s so beautiful!”, and proudly displaying it while it dries.

While it’s drying, you can get the background ready – I like using green and brown but you can choose whatever you like

Take whatever color will be the inner background and cut one inch off the length and one inch off the height – this will leave a half an inch margin all around. I do this by measuring out the inch along each side like this.

If you are making multiples, you can now use the cut out to trace/measure out the other papers rather than having to measure each side again

Next you can glue the inner background onto the outer background.

Few tips for this:
- Don’t use too much glue – it makes the paper wrinkly. Just use a fine line around the edges and a thin X or squiggle across the center.
- When you place the gluey paper down, use a ruler or another long flat edge to flatten it by running the flat edge from the center out to the edges. This ensures that fine line of glue you put around the edge actually spreads to the edge and won’t leave you with snags or corners coming off. It also more evenly distributes the glue and gives it a nice smooth background.
- Once you’ve glued the papers together I highly recommend pressing them – in preschool teacher language that means putting a nice big, flat book on top of the papers and putting a big ‘ole bucket of toys on top of that to weigh it down. This will ensure it dries flat.
- IMPORTANT – If you are making and pressing multiples of any project DO NOT press them directly on top of each other aka with the picture side touching another paper. No matter how many times I’ve tried this, there is always the tiniest amount of glue or paint that while they are being pressed, decides to become permanently attached to the other paper, and when I would go to separate them something would get ripped or there would be paint exchanging etc. What you can do is place two at a time like this: table – picture side down – picture side up – book – picture side down – picture side up – book etc. That way the glue/paint side is never touching another paper.
- Transparency time – clearly this list is all black while the other words are green lol – wordpress won’t let me change the color of a list?? Anyone have tip for me? leave it in the comments anyway back to business
Once the pumpkin and the papers are dry you can cut out the pumpkin and glue it to the center of the background (if you used regular paper for the pumpkin, use a small amount of glue again. If you used cardstock, use a bit more to make sure it really sticks).

Then press until dry (again make sure the pumpkin side isn’t touching another paper it could attach to or leave paint on).
And VOILA!

You can always customize this to your style – giving it a wider frame, not framing it at all, different colors, smaller or bigger pumpkin like I did here etc. As a teacher, I also usually take a marker and write on the frame something like “Suzy Fall 2020” or “Happy Halloween 2020!” so parents can remember when their kiddo made it
Like it? Please share or follow the blog to get notifications when more like it are posted!
